Greenhouse automation rocks

For at least a decade my wife and I have invested in seed plants and topsoil in an effort to grow vegetables for our family. Very often we would see our vegetables reach near complete ripening only to have deer or rabbits devour our garden in one night. It was frustrating because my wife really wanted to grow her own vegetables. Then this spring my wife presented a plan to try an aquaponics setup and I looked into the option. I learned a lot about aquaponics but it didn’t seem to be a good first step. On googling I realized that a close cousin of aquaponics was hydroponics and the 2 technologies shared a lot of the same tooling. So I looked into creating a hydroponics system w/ a goal of eventually transitioning to aquaponics. Below is what we’ve learned.

  1. Keep it simple: The dutch bucket system is cheap and really easy to build.  It is also explained in great depth by MHP Gardener’s videos.
  2. Harden your greenhouse:  We had numerous issues with our harbor freight greenhouse imploding whenever the wind blew but this guy gave great advice on the best way to keep your greenhouse from falling apart.
  3. Start w/ simple automation:   I knew I wanted to use the openhab home automation package to control and monitor my greenhouse growing but I elected to initially use a simple Christmas light timer instead.  It worked great and bought me some time to hook up the sensors and motor controls I eventually implemented.
  4. Plant a few of your plants in regular topsoil so you can see if your system is a better option then conventional growing.  We noticed that certain plants thrived in the hydroponics system (e.g. lettuce) but our strawberries did not.  It has a lot of do w/ the nutrient medium and/or pH.  Having a few plants in topsoil as a control gave us some context as to whether the juice was worth the squeeze.

So how did we do..

Here is an image of the cucumber plant we planted in regular topsoil and then watered daily.

Here is a picture taken at the same time from a sister plant (same vendor seedling) planted in our hydroponics system.

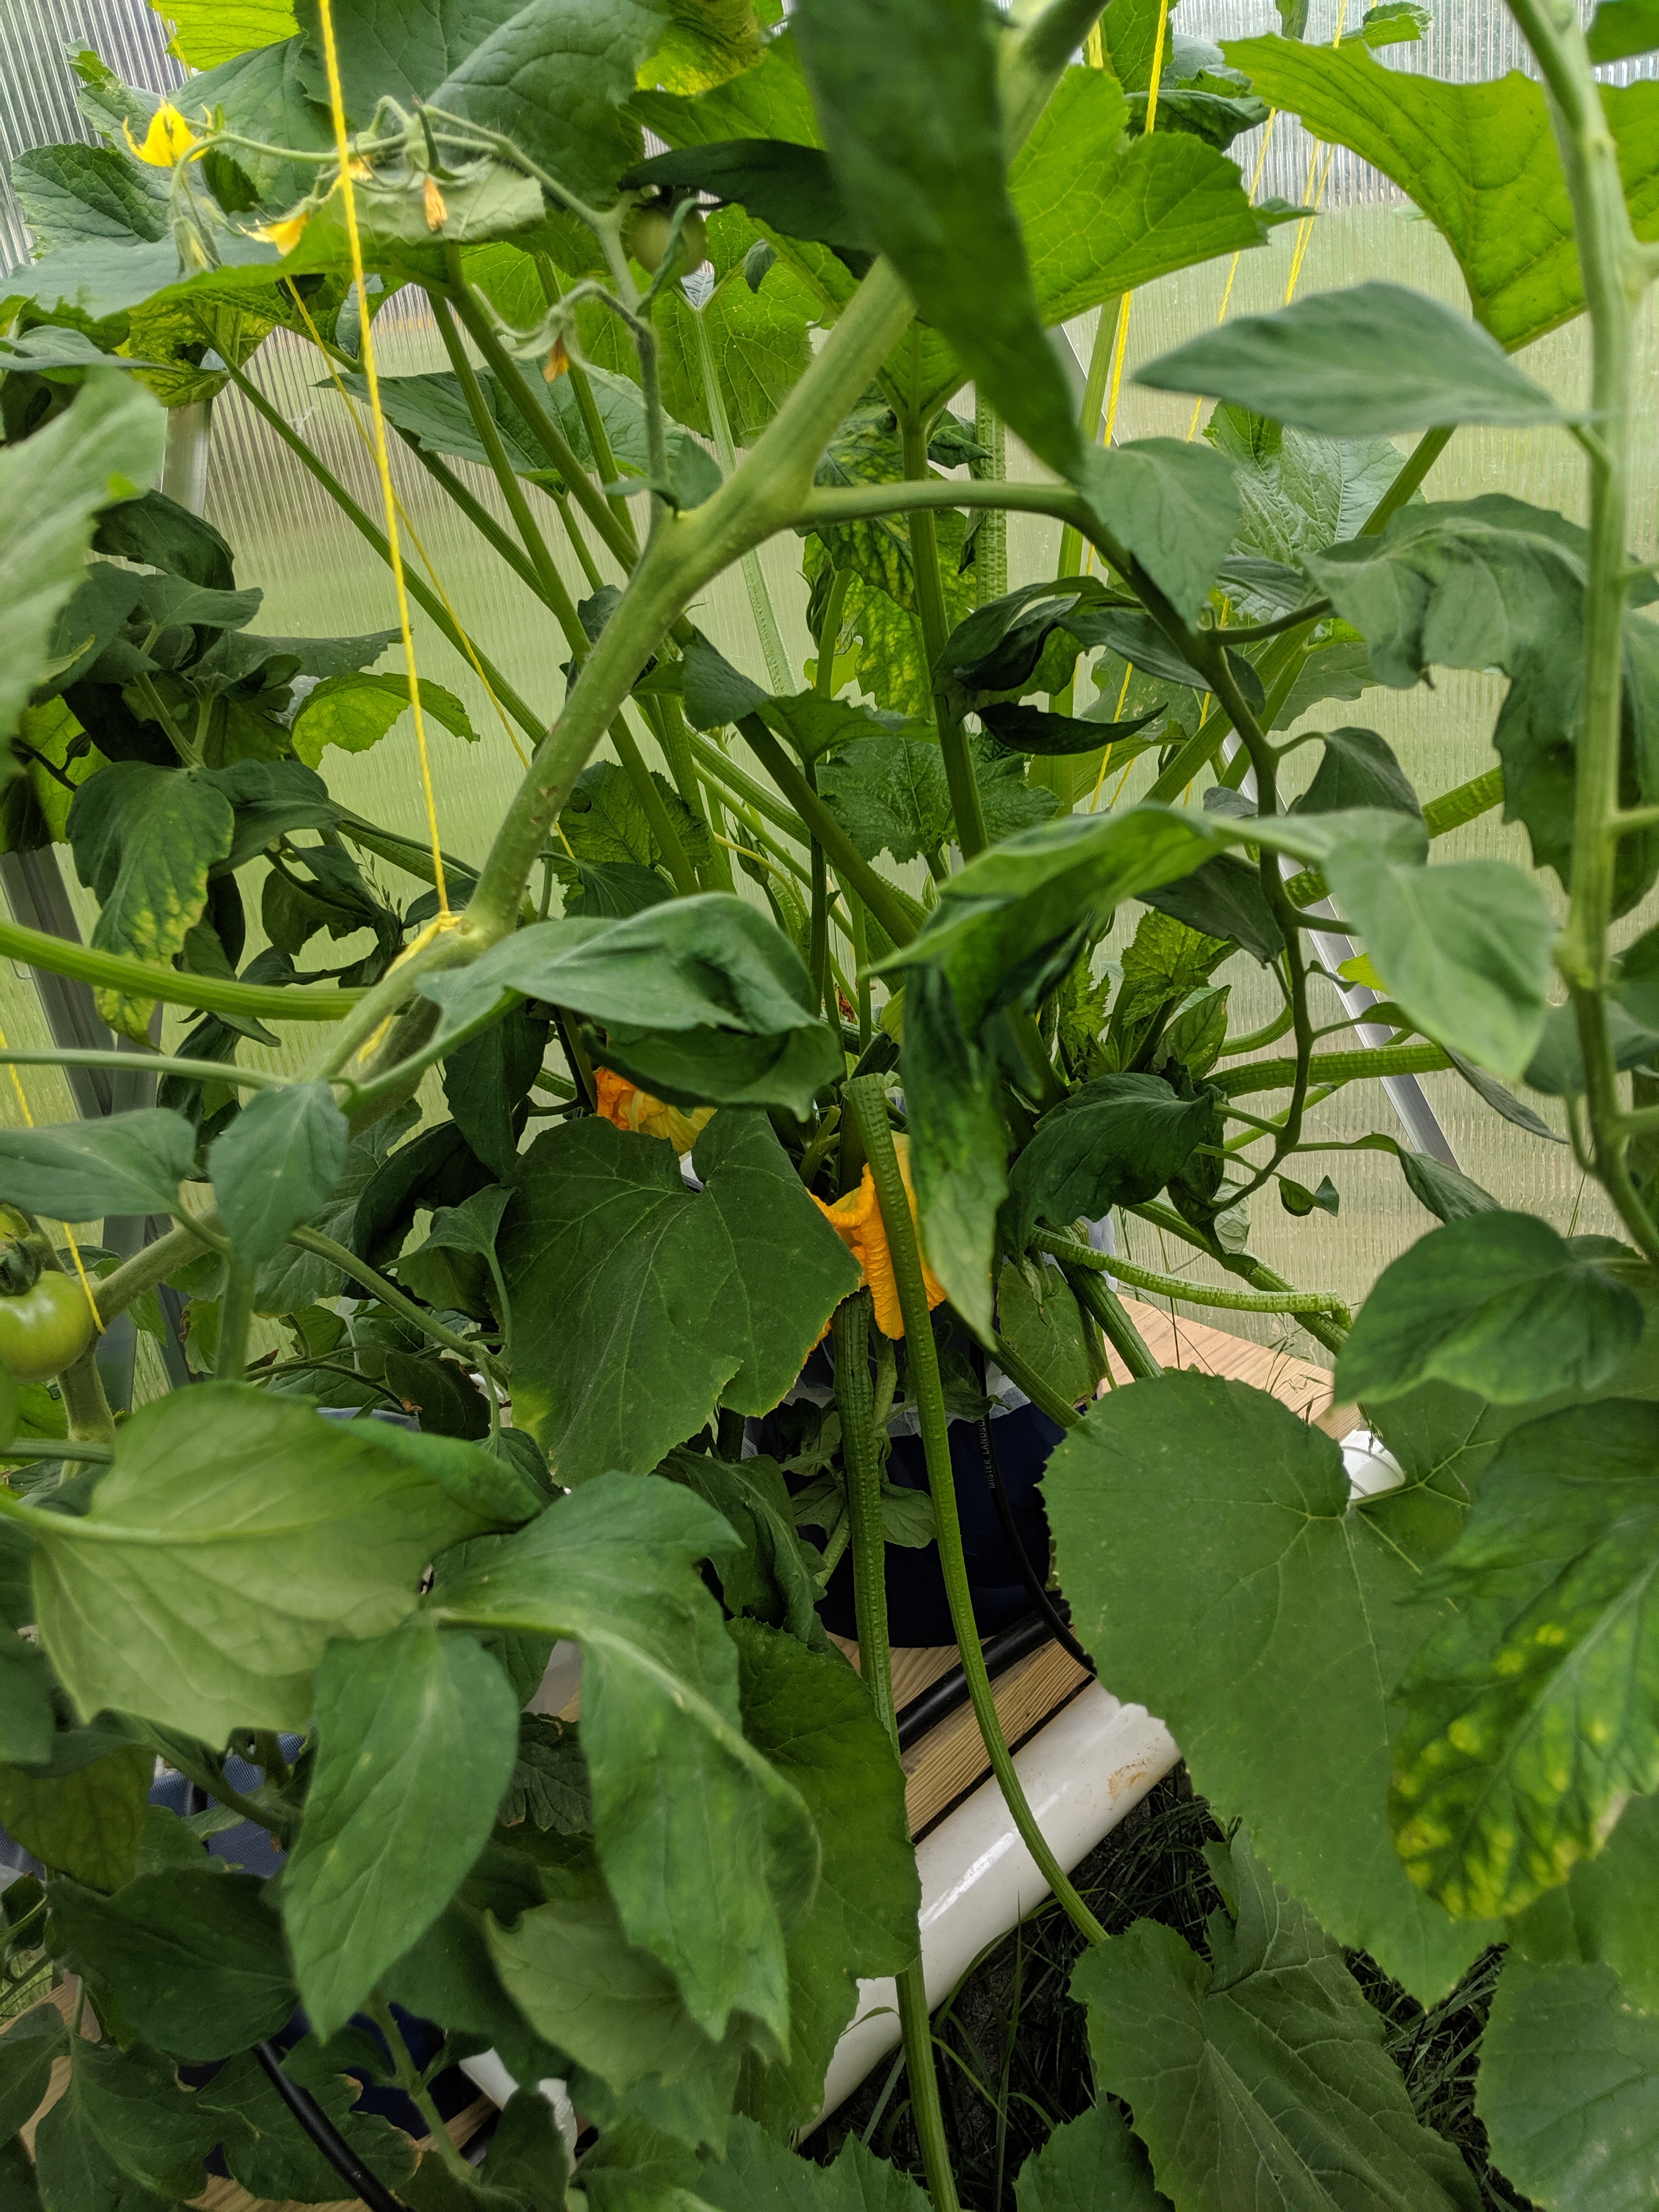
It basically takes over the frame and ended up taking over the greenhosue.

Here is an image of a portion of the dutch bucket system we built:This image shows our yellow pepper plants and the plumbing we used.  We ended up using 3.5-gallon Rubbermaid trash cans for our pots due to their size and black coloring (i.e. to decrease algae growth)

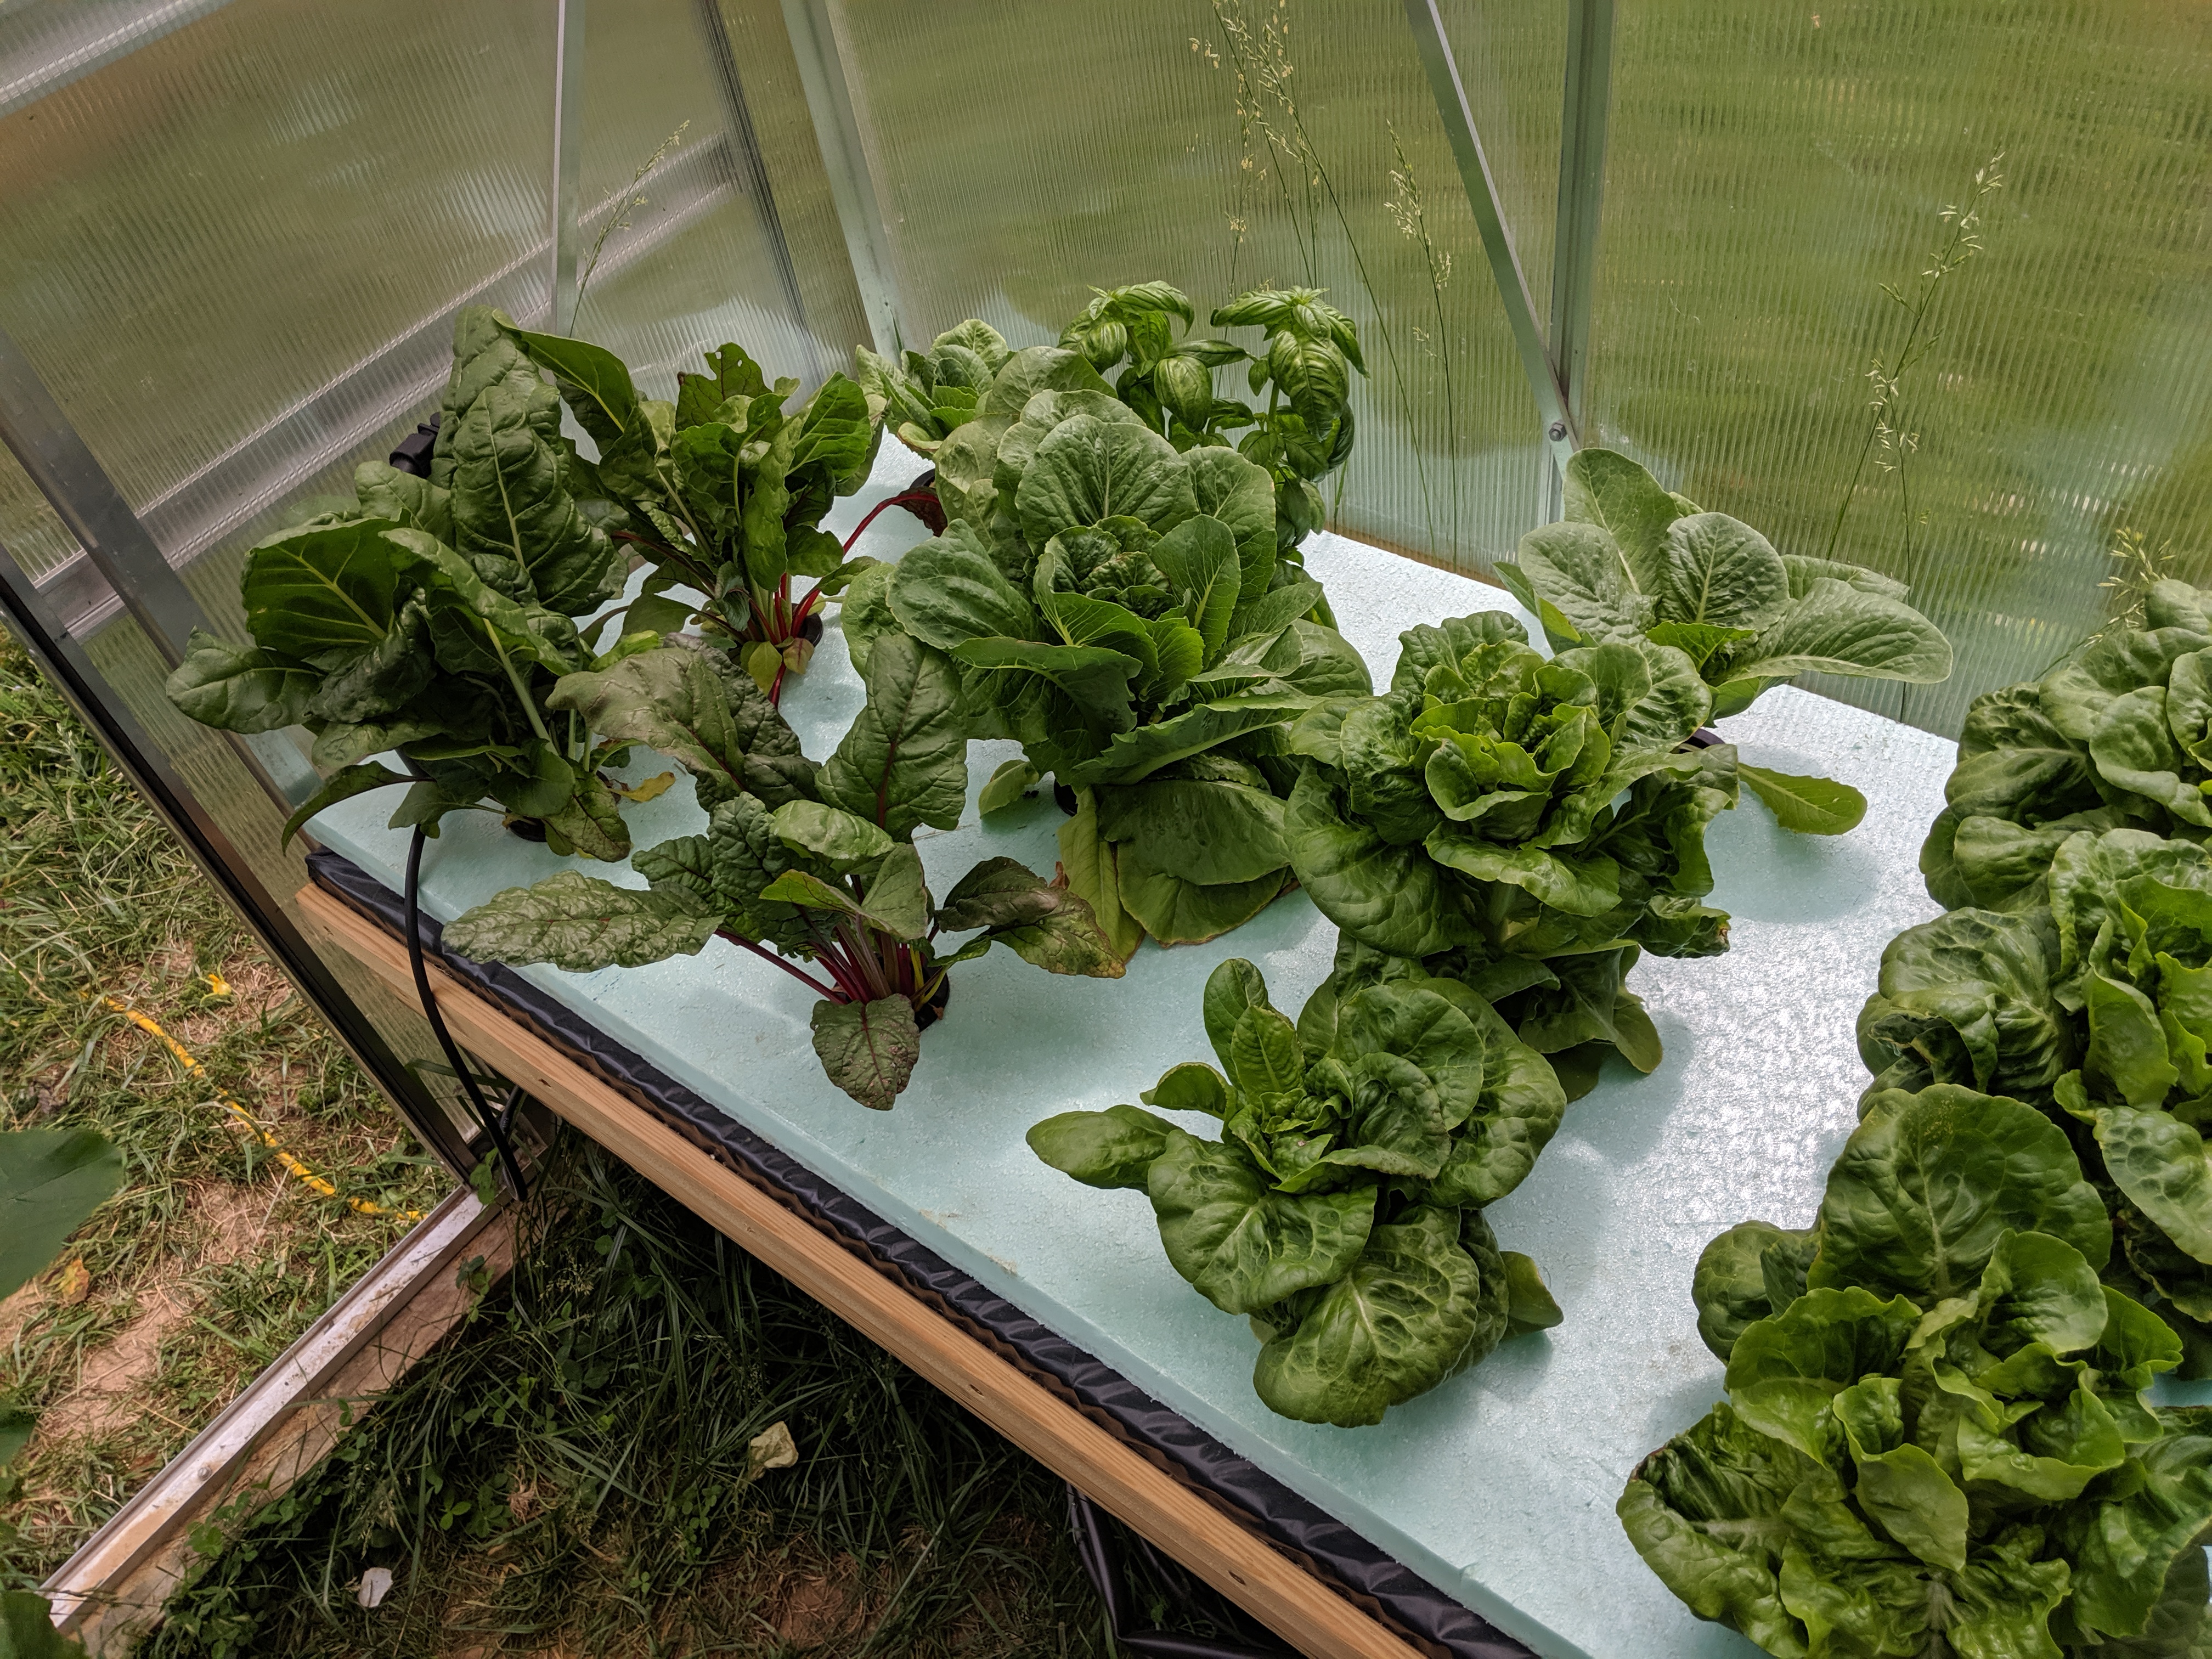
Below is our lettuce drip tray.  We grew swiss chard, romaine lettuce, and basil.  We choose a recirculating drip tray that drained out the bottom of the tray back into the reservoir.

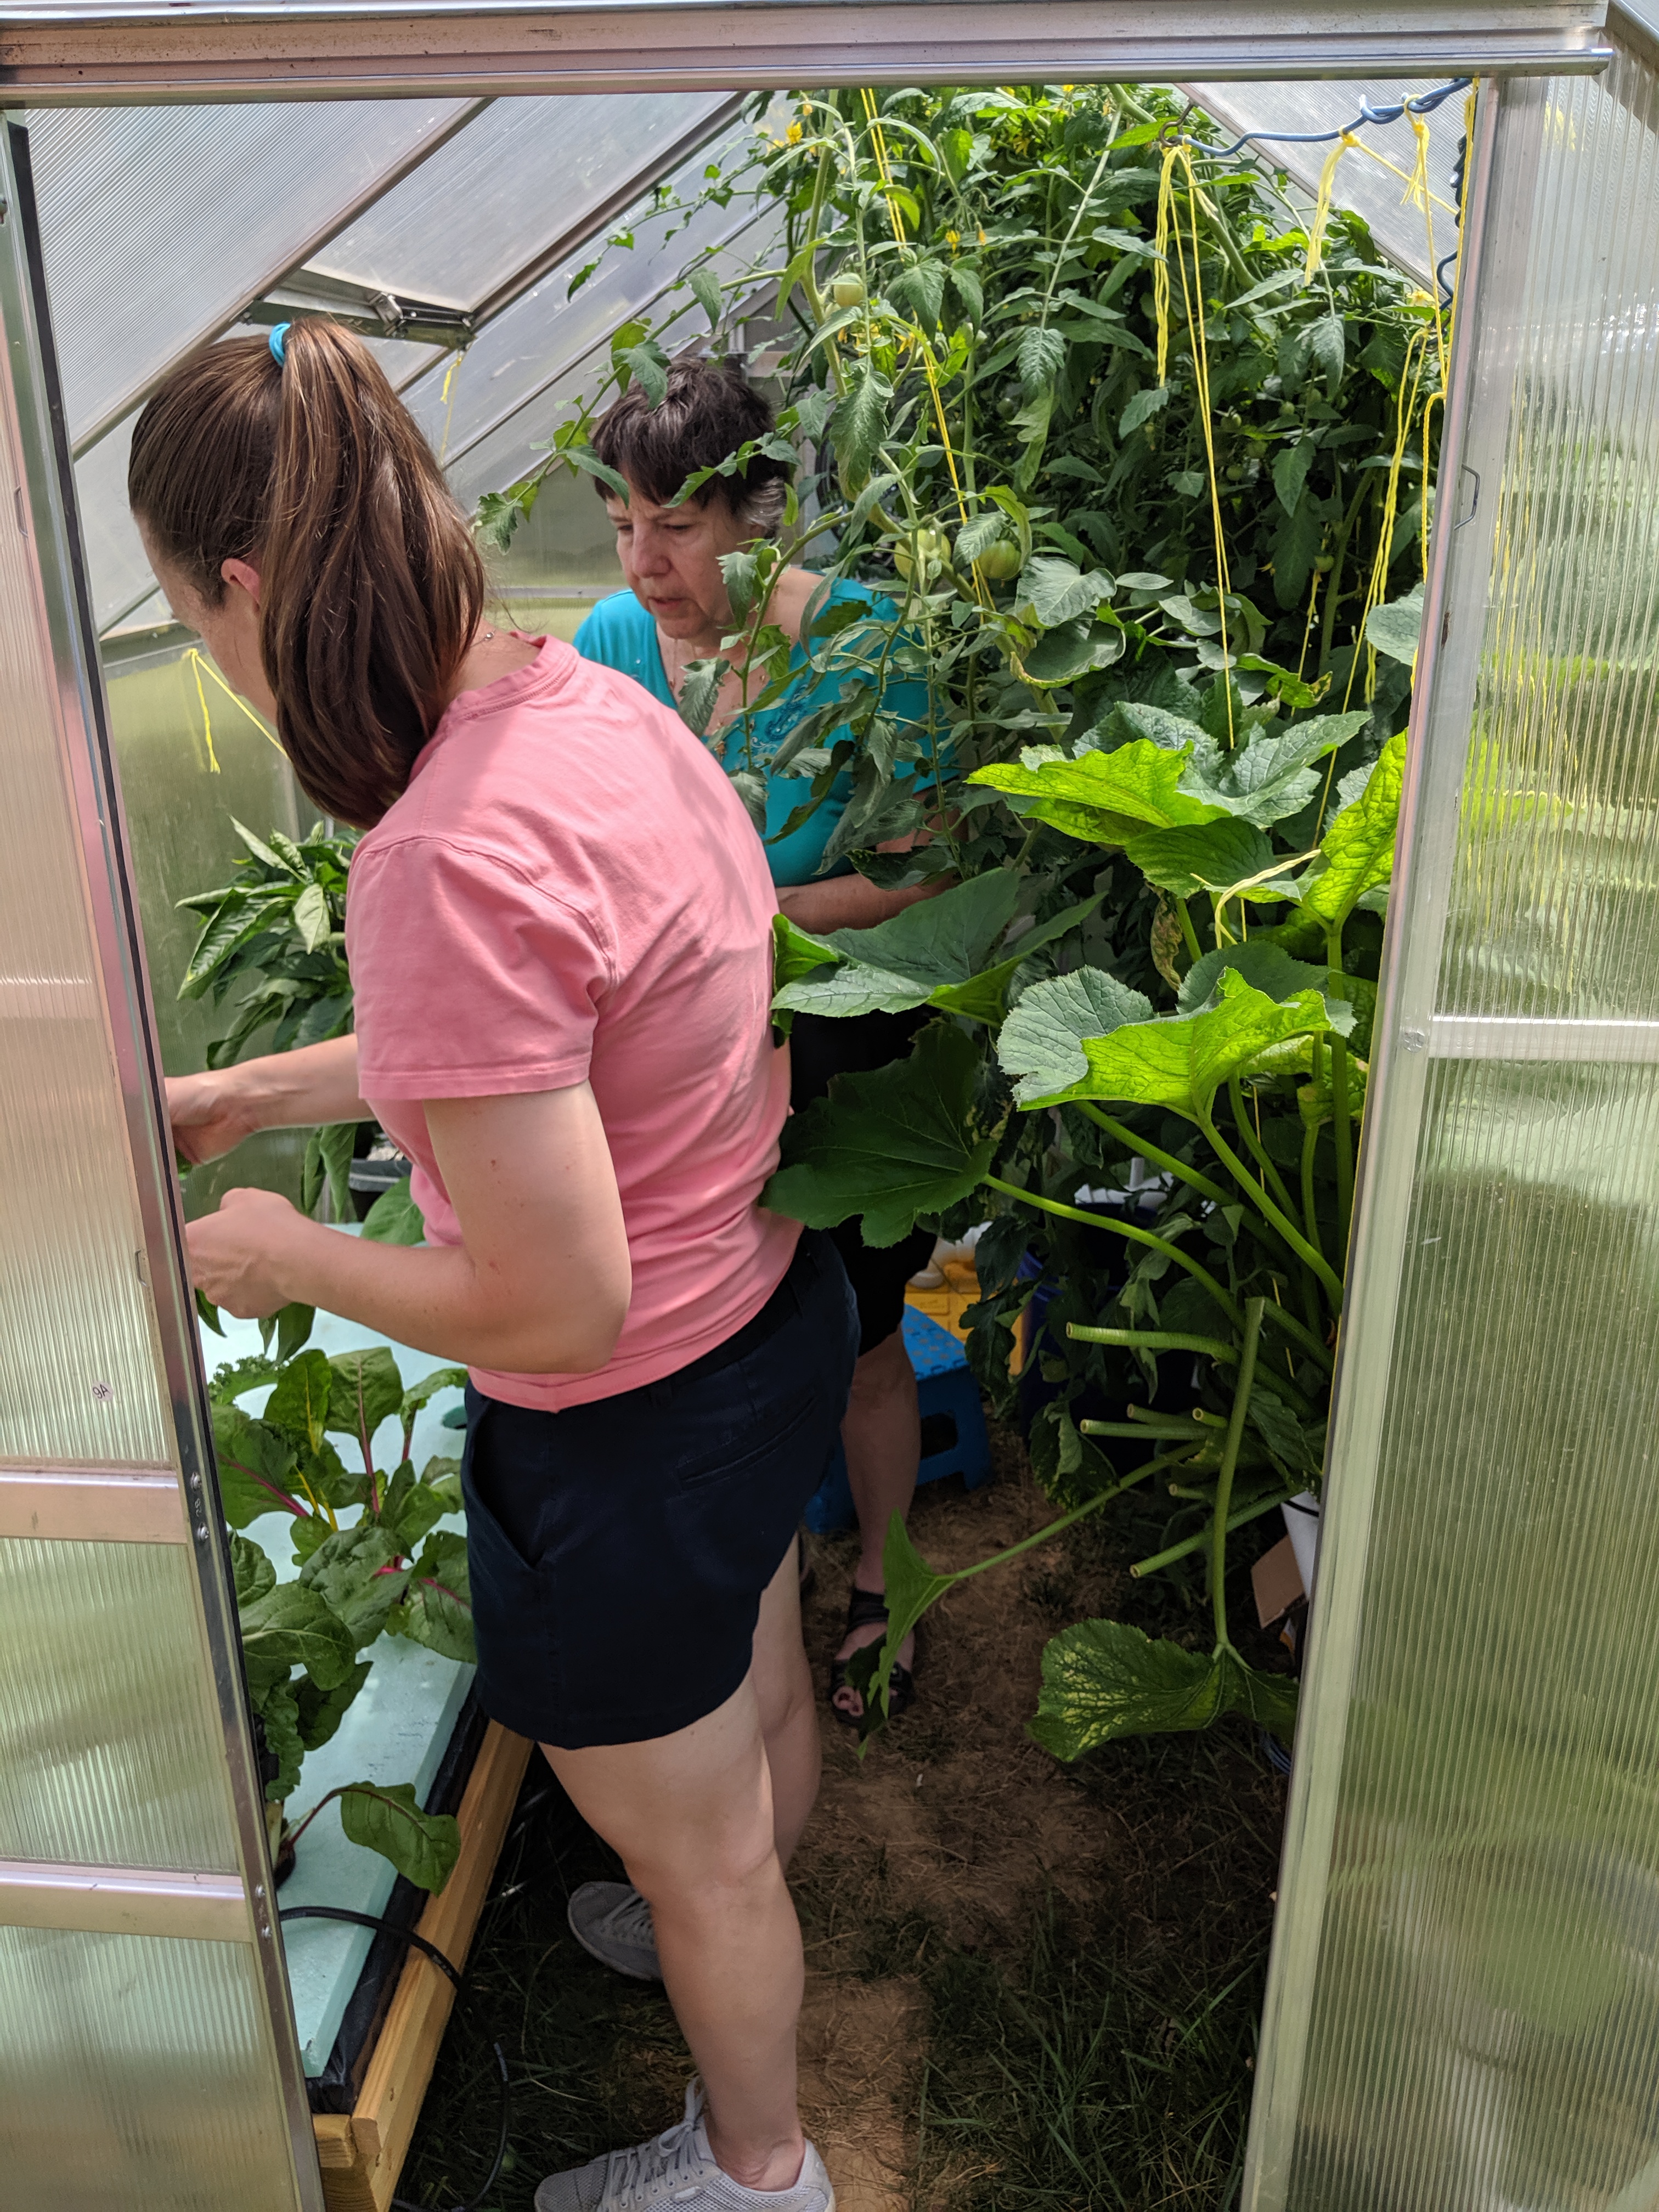
As you can see from the picture below, the greenhouse plants were so prolific that my wife and mom could barely fit in the greenhouse to harvest the vegetables.

Of note, I did implement the openhab automation system to control the greenhouse’s exhaust fan and solution pump. I also used a raspberry pi zero coupled with an ultrasonic distance sensor to measure the hydroponic reservoir’s depth. The depth measurement was used by openhab to send an email to my wife and me when the reservoir needed to be refilled.

Link to my becamp presentation on the same topic

Posted in Uncategorized | Leave a comment

ddwrt DNS resolution error due to question mark

Just an FYI to anyone who mistakenly puts a question mark (i.e. ?) at the end of one of their hostnames in the static leases section of their DHCP server tab. It will hose all DNS lookups (i.e. no internet) on the network served by the ddwrt router. I know this should be obvious to any web developer, but I did this and it took me 30 mins to resolve the issue. Hope this helps someone else.

Posted in Linux, networking, Uncategorized | Leave a comment

Proxmox postfix relayhost authentication error

I’ve grown to really appreciate the community version of the proxmox vitalization server, but because I’m too poor to afford the subscription version I tend to upgrade the entire server on a semi-annual basis. I do this by moving all the containers, or KVM images, to another proxmox server, then upgrade the now bare proxmox server using the updated proxmox install iso .  I then reconfigure the server to my specific needs using a bash script. One of the tasks in this script is to set up postfix’s relayhost config to allow my promox server to email via google’s smtp servers when something is wrong. It is usually pretty straight forward, but with proxmox version 4.0 (based on Debian Jessie) I got this error in /var/log/mail.log:

SASL authentication failed; cannot authenticate to server smtp.gmail.com no mechanism available

Since I had used the exact same setup/configs as my prior servers I knew something was up. A quick search of google produced the answer. I needed to run:

aptitude install libsasl2-modules

And then everything worked. Thank you HowToForge for the answer.

For those who are interested, here’s the relevant portion of my install script

#Add email forwarding
aptitude install -y libsasl2-modules #this fixed a SASL authentication failed; cannot authenticate to server smtp.gmail.com no mechanism available error
sed -i 's|relayhost =|relayhost = [smtp.gmail.com]:587|g' /etc/postfix/main.cf
sed -i 's|mynetworks = 127.0.0.0/8|mynetworks = 127.0.0.0/8, 10.X.X.X/24|g' /etc/postfix/main.cf
sed -i 's|inet_interfaces = loopback-only|inet_interfaces = all|g' /etc/postfix/main.cf
echo "smtp_use_tls=yes
smtp_sasl_auth_enable = yes
smtp_sasl_password_maps = hash:/etc/postfix/sasl_passwd
smtp_tls_CAfile = /etc/ssl/certs/ca-certificates.crt
smtp_sasl_security_options =
mydomain= $DOMAIN
myhostname= $HOSTNAME.$DOMAIN
myorigin=$HOSTNAME.$DOMAIN" >> /etc/postfix/main.cf
#add password db for email google authentication
echo "[smtp.gmail.com]:587 me@gmail.com:"$GOOGLE_PW > /etc/postfix/sasl_passwd
chmod 400 /etc/postfix/sasl_passwd
postmap /etc/postfix/sasl_passwd
#register aliases and restart postfix
echo "root:me@medengineers.com" >>/etc/aliases
newaliases
/etc/init.d/postfix restart


Posted in Uncategorized | Leave a comment